Suspension Trainer Interval Workout for Total-Body Strength
By Simple HIIT Timer Team · November 20, 2026
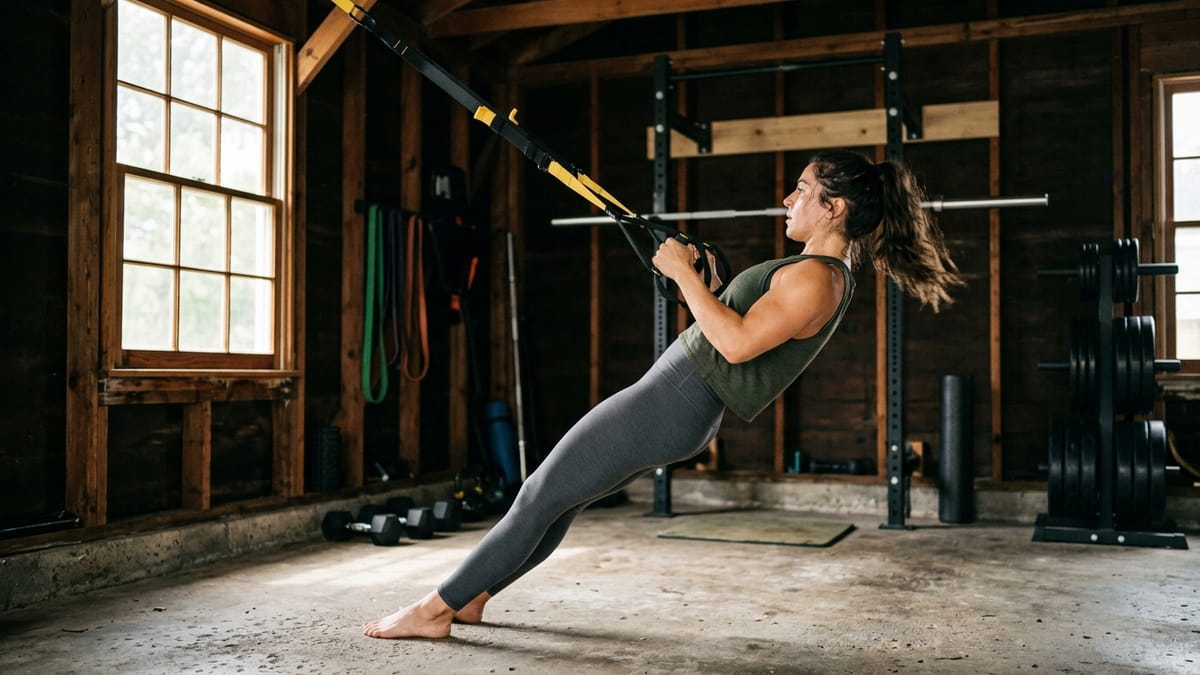
Suspension trainers are among the most versatile pieces of equipment you can own for home or gym training. Whether you anchor straps to a sturdy doorframe, an overhead beam, or a gym rig, suspension training forces you to control your body weight through space. Because the straps are free-moving, every single exercise requires intense core stabilization to keep your body aligned.
Why Combine Suspension Training with Intervals?
Many people struggle with traditional rep counting when using a suspension trainer. If you aim for exactly ten reps of a chest press, but you place your feet just an inch too far forward, you might fail at rep six. If you step back too far, ten reps will feel far too easy. Because the resistance is entirely dependent on your body angle, strict rep schemes often lead to frustration or suboptimal workouts.
Using an interval timer eliminates this problem. By shifting your focus from hitting a specific number of reps to working for a set duration, you can prioritize time under tension. If an exercise feels too difficult halfway through a working interval, you simply take a half-step backward to reduce the angle and keep moving until the clock stops. This continuous effort elevates your heart rate, turning a standard strength routine into an efficient cardiorespiratory challenge.
Setting Up Your Workout Workspace
Before starting any suspension routine, safety must be your top priority. Always weight-test your anchor point by pulling sharply on the straps before you begin. If you are using a door anchor, make sure you pull the door closed toward you so your body weight is pulling against the door jamb, not the latch. Ensure the straps are not twisted and that the handles hang at an even length.
For this routine, you will use a work-to-rest ratio of 40 seconds of effort followed by 20 seconds of rest. This gives you enough time to perform 12 to 15 controlled repetitions while leaving exactly enough rest time to adjust the strap length or turn your body around for the next movement. You can load this exact timing directly using the Exercise Timer.
The Dynamic Warm-Up
Suspension training requires mobile shoulders and active hips. Spend three to five minutes preparing your joints before starting the clock.
- Arm Circles: Perform 15 large circles forward, then 15 backward, keeping your chest proud.
- Bodyweight Squats: Complete 15 slow squats, focusing on pushing your knees outward and keeping your heels flat on the floor.
- Plank Walkouts: Start from a standing position, hinge at the hips, and walk your hands out to a high plank. Hold for two seconds, then walk your hands back to your feet. Repeat 5 times.
- Torso Twists: Stand tall and gently rotate your torso from side to side, letting your arms swing naturally to loosen your lower back.
The 20-Minute Total-Body Suspension Circuit
This routine consists of five exercises. You will perform each movement for 40 seconds, rest for 20 seconds, and then move immediately to the next exercise. Once you complete all five movements, that equals one round. Complete four total rounds for a highly effective 20-minute workout. If you need a longer session, you can always adjust your settings using the Workout Timer.
| Exercise Number | Movement | Work Time | Rest/Transition |
|---|---|---|---|
| Station 1 | Suspended Rows | 40 seconds | 20 seconds |
| Station 2 | Suspended Chest Press | 40 seconds | 20 seconds |
| Station 3 | Assisted Reverse Lunges | 40 seconds | 20 seconds |
| Station 4 | Suspended Plank | 40 seconds | 20 seconds |
| Station 5 | Y-Flyes | 40 seconds | 20 seconds |
1. Suspended Rows (Back and Biceps)
Adjust the straps to mid-length. Face the anchor point, grab the handles, and walk your feet forward until you are leaning back at a challenging angle. Keep your body in a straight line from your head to your heels. Pull your chest up to the handles by driving your elbows backward and squeezing your shoulder blades together. Slowly lower yourself back to the starting position with control. Do not let your hips sag toward the floor.
2. Suspended Chest Press (Chest, Triceps, and Core)
Keep the straps at mid-length or fully lengthened. Face away from the anchor point, holding the handles out in front of you. Walk your feet backward so your body leans forward into the straps. Brace your core tightly. Lower your chest toward the handles by bending your elbows to roughly 45 degrees, just like a traditional push-up. Press firmly through your palms to return to the starting position. The straps should hover just above your arms, not scrape against them.
3. Assisted Reverse Lunges (Legs and Glutes)
Adjust the straps to mid-length. Stand facing the anchor point holding the handles lightly for balance. Step your right foot backward and lower your right knee toward the floor until your left thigh is parallel to the ground. Drive through your left heel to return to a standing position. Alternate legs with each repetition. Use the handles only for stability and a slight assist if you get stuck; the primary effort must come from your legs.
4. Suspended Plank (Core)
Lower the straps so the foot cradles hang about mid-calf height. Kneel on the floor facing away from the anchor point and place your toes into the foot cradles. Place your hands or forearms on the floor. Lift your knees off the ground, engaging your core, glutes, and quads to hold your body in a perfectly straight, suspended line. Hold this position for the entire 40 seconds. If your lower back begins to arch or feel pinched, briefly drop your knees to the floor, re-brace your core, and lift back up.
5. Y-Flyes (Shoulders and Upper Back)
Adjust the straps to mid-length. Face the anchor point holding the handles. Walk your feet forward slightly—you will need a much shallower angle for this movement than you did for the rows. Start with your arms extended straight in front of you. Keeping your arms straight, pull the handles upward and outward so your body forms a "Y" shape at the top. Slowly lower yourself back down with control. This movement targets the small muscles of the upper back and shoulders, so focus on slow, deliberate movement rather than speed.
How to Scale the Difficulty
One of the greatest benefits of a suspension trainer interval workout is the ability to scale difficulty instantly using the vector resistance principle. The closer your feet are to the anchor point, the heavier the resistance becomes because you are lifting a larger percentage of your body weight. The further away you step, the lighter the resistance.
If you reach the 25-second mark of a 40-second interval and find that your form is breaking down, do not stop. Simply take a small step away from the anchor point to reduce the load and finish the interval with perfect technique. Conversely, if you finish an interval feeling like you could have done ten more reps, step closer to the anchor point on the next round.
Avoiding Common Suspension Mistakes
To get the most out of your training and protect your joints, keep these common errors in mind.
- The Sawing Effect: Most suspension trainers have a loop at the top that allows the straps to slide slightly. Do not let the straps saw back and forth during your reps. Keep an even amount of pressure on both handles at all times.
- Strap Scraping: During pushing movements like the chest press, the straps should not chafe against your upper arms. If they do, raise your hands slightly higher relative to your shoulders.
- Loss of Tension: Never allow the straps to go slack at the top or bottom of a movement. If the straps go loose, you have lost mechanical tension on the muscles. Keep constant tension on the fabric throughout the entire 40-second work period.
Integrating Suspension Intervals Into Your Week
Because suspension training is low-impact and easy on the joints, it serves as an excellent complement to heavier barbell training or high-impact cardio like running. You can perform this 20-minute circuit two to three times per week. For the best results, leave at least one full day of rest or light active recovery between your suspension workouts to allow your muscles to repair and adapt.
Always listen to your body. If you have any pre-existing medical conditions, shoulder injuries, or are pregnant, consult with a doctor or a certified physical therapist before starting a new exercise program. When executed with focus and proper form, a suspension trainer interval workout will challenge your stability, build functional muscle, and improve your overall athletic conditioning.
Frequently asked questions
Can you build muscle with a suspension trainer?
Yes, by adjusting your body angle to increase resistance, you can create the mechanical tension necessary to stimulate muscle growth. Using time-based intervals ensures your muscles remain under tension long enough to drive these adaptations.
How often should I do a suspension interval workout?
Aim for two to three sessions per week. This frequency provides enough stimulus to build strength and endurance while allowing at least one rest day between workouts for adequate muscle recovery.
Is suspension training safe for beginners?
Yes, suspension training is highly adaptable for beginners because you can instantly decrease the difficulty by adjusting your foot position. However, beginners should focus on slow, controlled movements and always double-check that the anchor point is completely secure.
Use this timer
Start the Full body: 40s / 20s timer — 40s work / 20s rest × 10 rounds. It runs in your browser with sound cues, and there is nothing to install.