Stationary Bike Interval Training: 3 Workouts to Boost Endurance
By Simple HIIT Timer Team · November 9, 2026
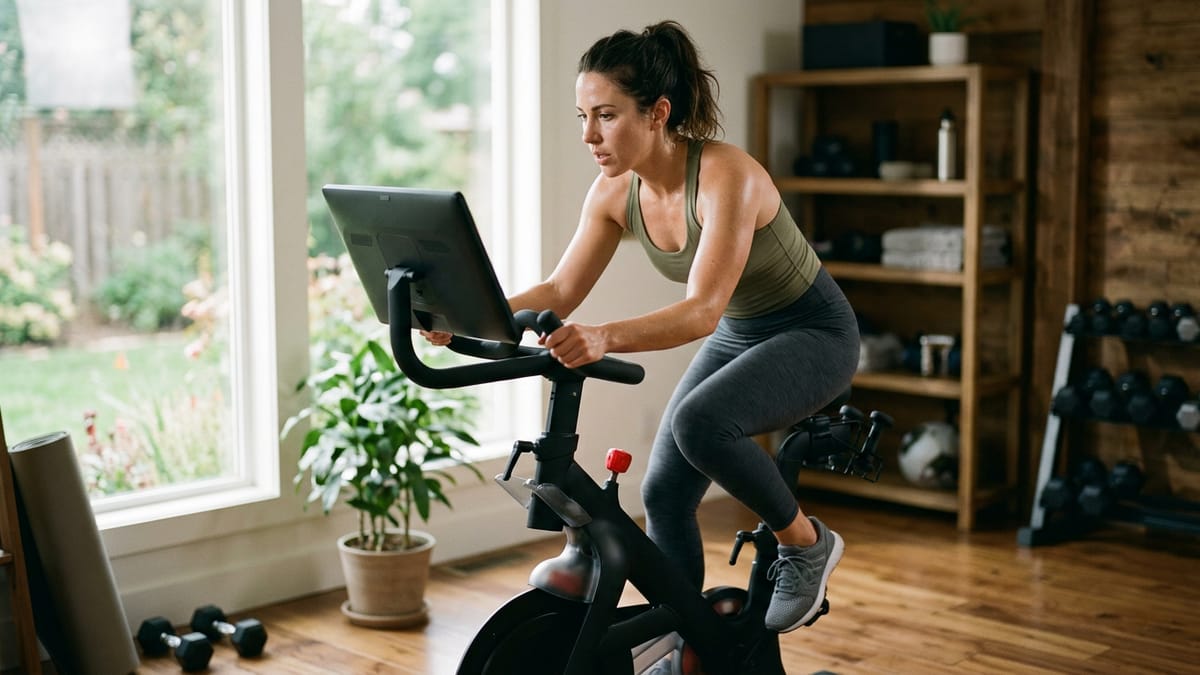
If you want a highly effective, joint-friendly way to build cardiovascular endurance, the stationary bike is one of the best tools available. Whether you are using an upright bike, a spin bike, or an air bike, stationary cycling allows you to push your cardiovascular limits in a completely controlled environment. By combining the bike with an interval timer, you can transform a monotonous steady-state ride into a challenging, time-efficient workout.
Why Choose the Stationary Bike for Intervals?
Interval training involves alternating between periods of high-effort work and lower-effort recovery. While you can perform intervals with almost any exercise, the stationary bike offers a unique set of advantages.
Low Impact on Your Joints
Unlike running or plyometric jumping, cycling is a non-weight-bearing exercise. Your feet remain in constant contact with the pedals, which eliminates the repetitive impact forces that can cause wear and tear on your knees, ankles, and hips. This makes stationary bike interval training an excellent option for individuals recovering from certain injuries, older adults, or anyone looking to add high-intensity cardio without accumulating extra joint stress.
Highly Scalable Resistance
On a stationary bike, you have total control over the resistance and your pedaling speed (cadence). This means the workout scales instantly to your fitness level. A beginner and an elite athlete can perform the exact same interval protocol side-by-side, simply by adjusting the resistance dial to match their individual capabilities. You never have to worry about keeping up with a treadmill belt or falling behind a pace group.
Safety During Maximum Effort
When you perform maximum-effort intervals, fatigue sets in quickly. If you are sprinting on a track or a treadmill, a sudden loss of coordination due to exhaustion can lead to a fall. On a stationary bike, you are seated and stabilized. If you hit the wall and need to stop abruptly, you simply stop pedaling. This inherent safety allows you to push closer to your true maximum effort during intense work periods.
Setting Up Your Bike for Success
Before you start the clock on your timer workout, you need to ensure the bike is set up correctly. Poor bike fit can lead to lower back pain, knee strain, and inefficient power transfer.
- Seat Height: Stand next to the bike. The top of the saddle should be roughly in line with your hip bone. When you are seated with your foot at the bottom of the pedal stroke (the 6 o'clock position), your knee should have a slight bend of about 25 to 30 degrees. If your hips rock side-to-side while pedaling, the seat is too high.
- Seat Fore/Aft Position: Sit on the saddle with your pedals leveled at the 3 o'clock and 9 o'clock positions. The front of your forward knee should be directly over the center of the pedal spindle. Adjust the seat forward or backward to achieve this alignment.
- Handlebar Height: For interval training, set the handlebars roughly even with the saddle height. If you lack flexibility or experience lower back tightness, raise the handlebars slightly higher than the saddle for a more upright, comfortable posture.
Understanding Resistance and Cadence (RPM)
To get the most out of stationary bike interval training, you need to manipulate two variables: resistance and cadence. Cadence is measured in Revolutions Per Minute (RPM).
A common mistake during intervals is pedaling as fast as possible with zero resistance. This is often called "spinning out" and it provides very little cardiovascular benefit while increasing the risk of knee pain. Your work intervals should always feel grounded. You want enough resistance so that your legs feel engaged and have something to push against.
When an interval calls for high intensity, you can achieve it by increasing the resistance and maintaining a steady RPM, or by keeping a moderate resistance and significantly increasing your RPM. The workouts below will specify how to approach these variables.
The Universal Warm-Up Protocol
Never jump straight into high-intensity intervals with cold muscles. A proper warm-up increases blood flow to your legs, lubricates your joints, and prepares your cardiovascular system for the sudden demands of interval training.
- Minutes 0-3: Easy pedaling at a light resistance. Your breathing should be relaxed, and you should be able to hold a normal conversation. Aim for 70-80 RPM.
- Minutes 3-5: Moderate pedaling. Increase the resistance slightly. Your breathing will deepen, but you shouldn't be gasping. Aim for 80-90 RPM.
- Minutes 5-7: Primer intervals. Perform three 15-second bursts of speed, returning to an easy pace for 45 seconds after each burst. This wakes up your central nervous system.
Workout 1: The 1-Minute Aerobic Builder
This workout uses longer work intervals to build your aerobic capacity and muscular endurance. Because the work periods are 60 seconds long, you cannot sprint all-out. Instead, you need to find a challenging but sustainable pace.
Timer Setup: Use the Interval Timer set to 60 seconds of work and 60 seconds of rest for 10 rounds.
| Phase | Duration | Execution |
|---|---|---|
| Work | 60 Seconds | Increase resistance to a moderate-heavy level. Pedal vigorously at 85-95 RPM. By the 45-second mark, your legs should be burning, and your breathing should be heavy. |
| Recovery | 60 Seconds | Drop the resistance significantly. Keep your legs moving at a slow, easy pace (60-70 RPM) to flush lactic acid and lower your heart rate. |
Repeat this cycle for 10 total rounds. The entire working portion of this routine takes exactly 20 minutes.
Workout 2: The 30/30 Speed Focus
Shorter intervals allow for a higher intensity. The 30/30 protocol is a classic interval structure that challenges both your aerobic and anaerobic systems. The goal here is faster pedal turnover with enough resistance to keep you stable.
Timer Setup: Use the Workout Timer set to 30 seconds of work and 30 seconds of rest for 12 rounds.
- Work Interval (30s): Turn the resistance to a moderate level. Stand up out of the saddle for the first 5 seconds to build speed, then sit down and pedal at a high cadence (95-110 RPM). You should be pushing hard enough that you could not maintain this pace for a full minute.
- Recovery Interval (30s): Lower the resistance and pedal slowly. Focus on taking deep, controlled breaths to recover as much as possible before the next sprint.
Complete 12 rounds. If you are an advanced rider, you can increase this to 15 or even 20 rounds as your fitness improves.
Workout 3: The Tabata Finisher
If you are short on time or looking for a brutal finisher to add to the end of a strength session, the Tabata protocol is the answer. It requires true maximum effort. Because the rest periods are only 10 seconds, your heart rate will remain elevated throughout the entire 4-minute block.
Timer Setup: Use the Tabata Timer, which is pre-programmed for 20 seconds of work and 10 seconds of rest for 8 rounds.
- Work Interval (20s): Crank the resistance up to a heavy setting. Give it absolutely everything you have. This is an all-out sprint. Your RPM should be high, and your exertion level should be at maximum.
- Recovery Interval (10s): Keep the resistance where it is, but slow your pedaling to a crawl. The 10 seconds will fly by, so stay focused and prepare to immediately sprint again when the timer beeps.
Do not pace yourself during a Tabata workout. The goal is to accumulate maximum fatigue over the 8 rounds.
The Cool-Down Protocol
Stopping abruptly after intense intervals can cause blood to pool in your legs, leading to dizziness or lightheadedness. An active cool-down helps your heart rate return to normal safely while promoting the removal of metabolic waste from your muscles.
After your final interval, reduce the resistance to a very light setting. Pedal at a comfortable, easy pace (60-70 RPM) for at least 3 to 5 minutes. Use this time to reflect on the workout, focus on deep nasal breathing, and let your body temperature begin to drop. Once you step off the bike, perform a few static stretches for your quads, hamstrings, and calves to maintain flexibility.
Frequently asked questions
How often should I do stationary bike interval training?
Aim for 1 to 3 times per week on non-consecutive days. Interval training is highly taxing on the nervous system and muscles, so your body requires adequate rest to recover and adapt.
Is stationary bike HIIT good for weight loss?
Yes, interval training burns a significant amount of calories in a short time. When combined with a sensible nutrition plan and a calorie deficit, it is a highly effective tool for weight management.
Should I increase resistance or speed during the work intervals?
It depends on the specific workout goal. Increasing resistance builds muscular endurance, while increasing speed (RPM) challenges your cardiovascular system. For safety, always ensure you have enough resistance to keep your pedaling smooth and controlled.
Do I need special cycling shoes for interval training?
No, standard athletic shoes work perfectly fine for most stationary bikes. However, cycling shoes that clip into the pedals can provide better power transfer and stability during intense sprinting intervals.
Use this timer
Start the 1 min on / 1 min off timer — 60s work / 60s rest × 10 rounds. It runs in your browser with sound cues, and there is nothing to install.